Timber frame cutting list: from the framing to the pieces to cut
In short
A timber frame cutting list turns the framing into the pieces the saw must cut: for every piece, a mark, a section, a cut length and a quantity. List the pieces panel by panel, group identical lengths within each section, then place them on stock lengths to see the offcuts. The same data gives two views: by panel for the assembly table, by section and length for the saw. Check that the totals match the panel drawings and the wall take-off before you order.
The take-off tells you how much timber a wall needs. The cutting list tells the saw what to cut: which sections, in which lengths, how many, for which panel. The two must agree, and the cutting list is the one that decides how much timber goes in the skip. Here is how to build it from the framing, which columns it needs, how to group it, how to handle stock lengths, and a worked 8 m wall.
What is the difference between a cutting list, a parts list and a take-off?
The three come from the same data and answer different questions:
| Document | Answers | Organised by | Used by |
|---|---|---|---|
| Parts list (nomenclature) | What does this panel contain? | Panel, then piece type | Assembly table, quality check |
| Cutting list | What does the saw cut? | Section, then length | Saw, stock handling |
| Take-off | How much timber does the job need? | Section, total length, volume, weight | Ordering, transport, estimating |
In practice the shop keeps one table of pieces, one row per piece type and panel, and builds the three views from it. The parts list is the panel's own part of the panel shop drawing. The wall take-off is the aggregate. The cutting list sits in between and decides what is actually bought and cut.
For steel, the equivalent step is described in light gauge steel take-off from a plan.
How do you get from the framing to a cutting list?
Start from the framing of each panel, as drawn on its sheet, and work through these steps:
- List the panels, with their marks, from the panel layout.
- List every piece in each panel: studs, jack studs, sills, short studs, bottom plates, top plates, lintels, noggings. Give each type a code (ST, JK, SL, SS, BP, TP, HB, LT). The head binder (HB), the second ply of the top plate, is listed separately, per wall: it is fitted on site, with its joints staggered from the panel joints.
- Give every piece its cut length, not the overall wall length: a stud is the wall height minus the plates, a bottom plate is cut at doors, a lintel is the opening plus its two bearings on the jack studs.
- Count the pieces of each length in each panel. Identical pieces share one row with a quantity.
- Add the section to each row. Never total different sections together: a 45 × 195 lintel isn't ordered like a 45 × 145 stud.
- Total each row (quantity × length) and each section.
- Place the lengths on stock lengths to see the offcuts and the real quantity to order (next sections).
- Check the totals against the panel drawings and the take-off.
Rebuilding the list by hand after every plan change is where lines get forgotten. Whichever tool you use, the list should be generated from the framing, not retyped.
What columns does a cutting list need?
| Column | Content | Why it is there |
|---|---|---|
| Panel | Panel mark (W1-P1) | Lets the pieces be kitted per panel |
| Mark | Piece code (ST, JK, BP…) | Matches the sheet and the label on the piece |
| Piece | Plain name (stud, lintel) | Readable at the saw |
| Section | 45 × 145, 45 × 195 | Sets the stock and the volume |
| Quantity | Number of identical pieces | The saw cuts them in one run |
| Cut length (m) | Length of one piece | The value the stop is set to |
| Total (m) | Quantity × length | Check total and order quantity |
| Notes | End cuts, treated timber, grade | Anything that changes how the piece is cut or bought |
Keep lengths in the same unit as the saw's stop (metres to three decimals, or millimetres). A cutting list with mixed units is a cutting list with errors.
Should you group the list by panel or by section?
Both, from the same table. The two groupings serve different people:
| Grouping | Good for | Risk if used alone |
|---|---|---|
| By panel | Kitting the pieces for one table, checking a panel against its sheet | The saw cuts the same length ten times in ten places, with more handling and more offcuts |
| By section, then length | Sawing in runs, sizing stock, nesting pieces on stock lengths | Pieces lose their panel: you must label each piece with its mark as it is cut |
The usual flow: sort by section and length for the saw, label each piece with its panel and mark, then deliver the pieces to the table kitted by panel. The label is what holds the two views together.
How do you handle stock lengths and offcuts?
Timber is bought in the lengths your supplier stocks, not in the lengths you need. The cutting list gives the pieces; nesting places them on stock lengths so that several pieces share one length and the offcut is as short as possible.
The rules of thumb:
- match the stud to the stock: a stud of 2.365 m comes out of a 2.40 m length with 35 mm to spare. Raise the wall by 50 mm to 2.55 m and the stud becomes 2.415 m: it no longer fits, it moves to a 3.00 m length and every stud leaves 0.585 m behind;
- start with the long pieces, then fill the remainder with short ones: the 0.86 m short studs come out of the offcut of a longer piece when one is available;
- keep plates for last: plate lengths follow panel widths, so check whether the panel width can be matched to a stock length (a 4.20 m panel takes a 4.20 m plate with no waste);
- allow for the saw kerf and for the defects your own grading rejects: the figures below are net, and the shop's own allowance goes on top, taken from your jobs.
Example: an 8 m wall in two panels, with its stock plan
Wall W1 of 8.00 × 2.50 m, studs 45 × 145 at 600 mm centres, one bottom plate and a double top plate, lintels in 2 plies of 45 × 195, a window of 1.20 × 1.25 m (from 2.00 to 3.20 m, sill at 0.95 m) and a door of 0.90 × 2.20 m (from 5.55 to 6.45 m), as in the take-off guide. The wall is split into panels W1-P1 (0 to 4.20 m) and W1-P2 (4.20 to 8.00 m), the first ply of the top plate cut per panel. The second ply (the head binder) is fitted on site, with its joints at 3.00 and 6.00 m, staggered from the panel joint: it is listed separately, as wall binder pieces. Example values to show the method: replace them with those from your plan, your build-up and your supplier.
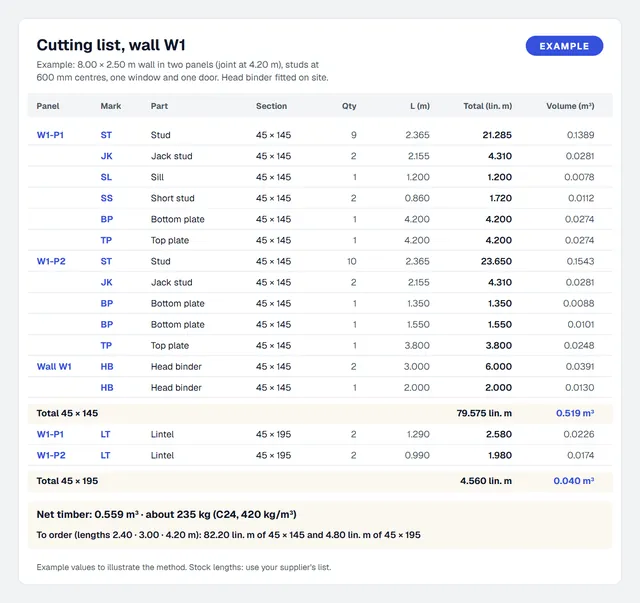
By panel. W1-P1 holds 9 studs, 2 jack studs, a sill, 2 short studs, a bottom plate, a top plate and 2 lintels (18 pieces). W1-P2 holds 10 studs, 2 jack studs, 2 bottom plate pieces (cut at the door), a top plate and 2 lintels (17 pieces). Wall binder pieces: the second ply of the top plate is 8.00 m long in 3 pieces (3.00, 3.00 and 2.00 m), butted at 3.00 and 6.00 m, that is 1.20 m and 1.80 m from the panel joint (4.20 m): it runs across the joint and ties the two panels together. The joint adds one end stud: 19 studs in all, against 18 in the continuous wall of the take-off guide.
By section and length (the saw's view), 45 × 145:
| Cut length (m) | Qty | Pieces | Total (m) |
|---|---|---|---|
| 2.365 | 19 | Studs (both panels) | 44.935 |
| 2.155 | 4 | Jack studs | 8.620 |
| 4.200 | 2 | P1 bottom plate and top plate | 8.400 |
| 3.800 | 1 | P2 top plate | 3.800 |
| 1.550 | 1 | P2 bottom plate, door to corner | 1.550 |
| 1.350 | 1 | P2 bottom plate, joint to door | 1.350 |
| 1.200 | 1 | Window sill | 1.200 |
| 0.860 | 2 | Short studs under the sill | 1.720 |
| Total of the panels, 45 × 145 | 31 | 71.575 | |
| 3.000 | 2 | Wall binder: head binder, common pieces | 6.000 |
| 2.000 | 1 | Wall binder: head binder, end piece | 2.000 |
| Total 45 × 145 | 34 | 79.575 | |
| 45 × 195: 1.290 × 2 and 0.990 × 2 | 4 | Lintels | 4.560 |
Volume and weight. 79.575 × 0.006525 + 4.56 × 0.008775 = 0.519 + 0.040 = 0.559 m³ net, about 235 kg in C24 at 420 kg/m³ (the density used in the take-off guide).
Stock plan. Suppose the supplier stocks 45 × 145 in 2.40, 3.00 and 4.20 m, and 45 × 195 in 2.40 m (example lengths: use your supplier's list):
| Stock | Lengths | Pieces on each length | Offcut (m) |
|---|---|---|---|
| 45 × 145, 2.40 m | 23 | 1 stud (2.365) or 1 jack stud (2.155) | 0.035 or 0.245 |
| 45 × 145, 4.20 m | 3 | 2 plates of 4.20 exactly; 1 plate of 3.80 | 0 or 0.400 |
| 45 × 145, 3.00 m | 1 | 1.350 + 1.550 (bottom plate, P2) | 0.100 |
| 45 × 145, 3.00 m | 1 | 1.200 + 0.860 + 0.860 (sill and short studs) | 0.080 |
| 45 × 145, 3.00 m | 2 | 1 head binder of 3.00 exactly | 0 |
| 45 × 145, 2.40 m | 1 | 2.000 (head binder, end piece) | 0.400 |
| 45 × 195, 2.40 m | 2 | 1.290 + 0.990 (a window and a door lintel ply) | 0.120 |
To order: 82.20 m of 45 × 145 (31 lengths) and 4.80 m of 45 × 195 (2 lengths). The offcuts are 2.625 m on 45 × 145 (3.2 %) and 0.24 m on 45 × 195 (5 %). Add the shop's own allowance for defects and re-cuts on top. A different panel split, a higher wall or another stock list changes this plan, which is why the stock plan is redone for each job, not copied.
How do you check the cutting list before ordering?
Three controls, in this order:
- Per panel: the pieces of each panel on the list match the parts list of its sheet, line for line.
- Per wall: the totals by section equal the sum of the panels. A wall in panels exceeds the continuous wall by the end studs at the joints (one extra stud per joint in this example).
- Per job: the volume and weight by section match the take-off. A gap points to a missing line, a wrong cut length or a different build-up between the take-off and the drawings.
Do the check before the order goes out, not when the timber arrives short.
Frequently asked questions
What is a cutting list in timber frame construction?
The list of pieces the saw must cut, with for each one a section, a cut length, a quantity and a mark. It comes from the framing of each panel and is usually sorted by section and length.
What is the difference between a cutting list and a bill of materials?
The cutting list gives the pieces to cut from stock. A bill of materials (or parts list) gives everything that goes into a panel or a job, including boards, membranes and fixings. In a timber frame shop the cutting list covers timber and nothing else.
How do you reduce offcuts?
Match the piece lengths to the stock lengths: wall height and stud length against the stock, panel width against plate stock. Then nest short pieces on the remainder of long ones, and redo the plan when the wall height or the panel split changes.
Should the cutting list include noggings?
Yes, if your build-up has them. Add a line per row of noggings in each panel, with its section and cut length. The example above has none, so its totals stay comparable with the take-off guide.
Doing it with Stud: the quantities to check the list against
Stud is an AI agent, in free beta, that builds the model, the panels and the framing from the plan you already have, and gives the quantities:
- you upload a DXF or PDF plan, a plan image or a dimensioned sketch; the agent builds the 3D model and uses a standard value, flagged for you, for a dimension it is missing;
- it splits the walls into panels with the maximum width and stud spacing you set, and draws the framing of each panel, step by step in the 3D view;
- the take-off gives the wall, floor and roof surfaces, and the volume and weight of timber, from the model; when the plan changes, you ask for the change and the quantities follow;
- with the Framer plan, the production PDFs give the framing plan of each level and one sheet per panel.
The timber volume and weight are your control total: your cutting list, grouped however the saw needs it, must come back to them. Stud doesn't draw up the cutting list for you, and it doesn't do structural design or code checks. The free beta does everything in the app, without exports.
Free beta: sign up and try it on one of your own plans, then compare the timber weight with your list.
Related guides
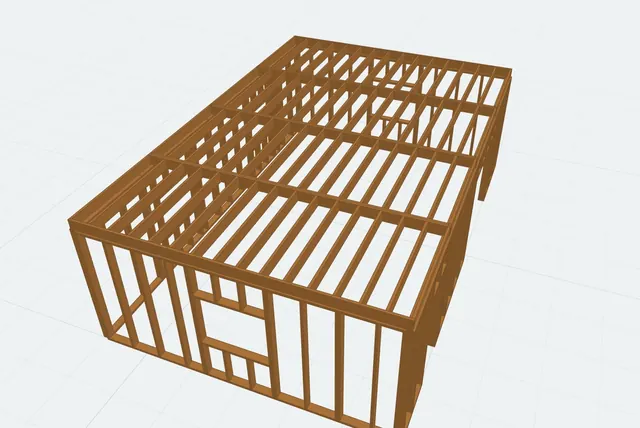 Stud spacing 400 vs 600 mm (16 vs 24 in. o.c.): what it does to the take-offHow many extra studs, m³ and kg at 400 mm centres, and what the stud size adds. The 8 m wall recounted piece by piece.
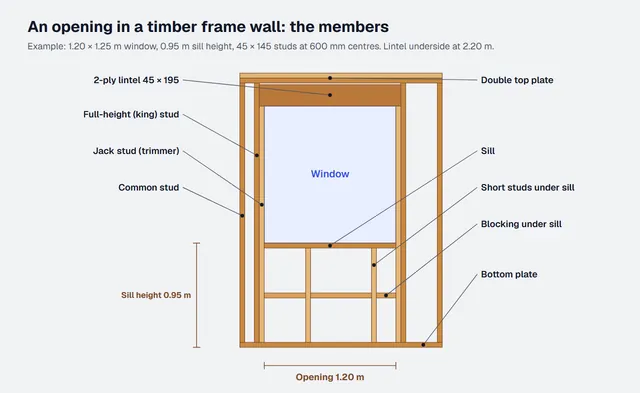 Timber frame window opening: lintel, jack studs and sill in a wallKing and jack studs, lintel, sill, short studs and blocking: how to count and cut them, with a worked example.
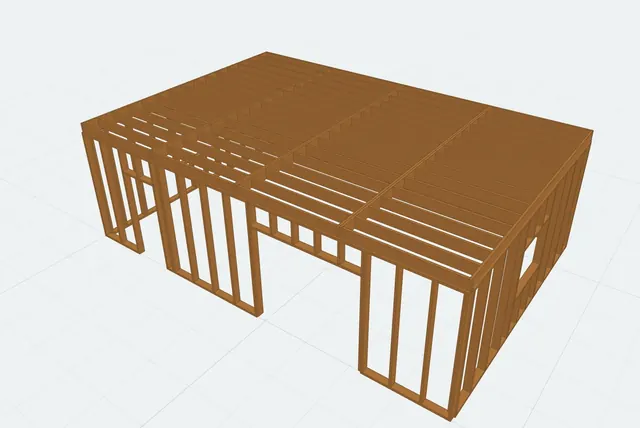 Timber frame estimating and design software: what to use at each stageSpreadsheets, timber CAD/CAM, PDF takeoff tools and AI agents, sorted by stage, with a comparison table and a worked example in hours.